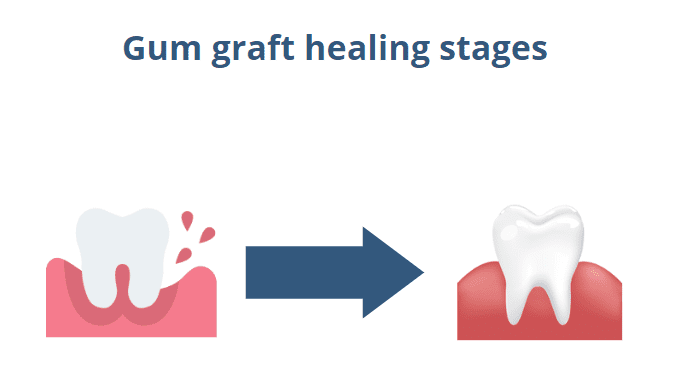
The Different Healing Stages of a Gum Graft (Day by Day Pictures)
 Gum grafting is a popular and highly successful procedure. It typically involves taking a small piece of soft tissue—often from the roof of your mouth—and placing it over the areas where your gums have receded. The main goal is to cover exposed roots, strengthen your gum line, and prevent further damage.
The graft usually takes hold well and heals without any issues. However, the donor site (usually the roof of your mouth) can take a bit longer to heal and may cause some discomfort during recovery.
Remember that the first few days after surgery are the most critical. They can either make or break your graft’s survival and healing.
In this article, we’ll break down each stage of gum graft healing, step by step.
In this article...
What are the healing stages of a gum graft?
After a gum graft, it's normal to experience some mild and temporary side effects such as discomfort, swelling, and bleeding. These are part of the natural healing process and should gradually decrease over time.
Below are the healing stages of a gum graft using a technique called a free gingival graft. But all techniques follow a similar process.
1. The first 24-48 hours: Blood Clotting and Inflammation
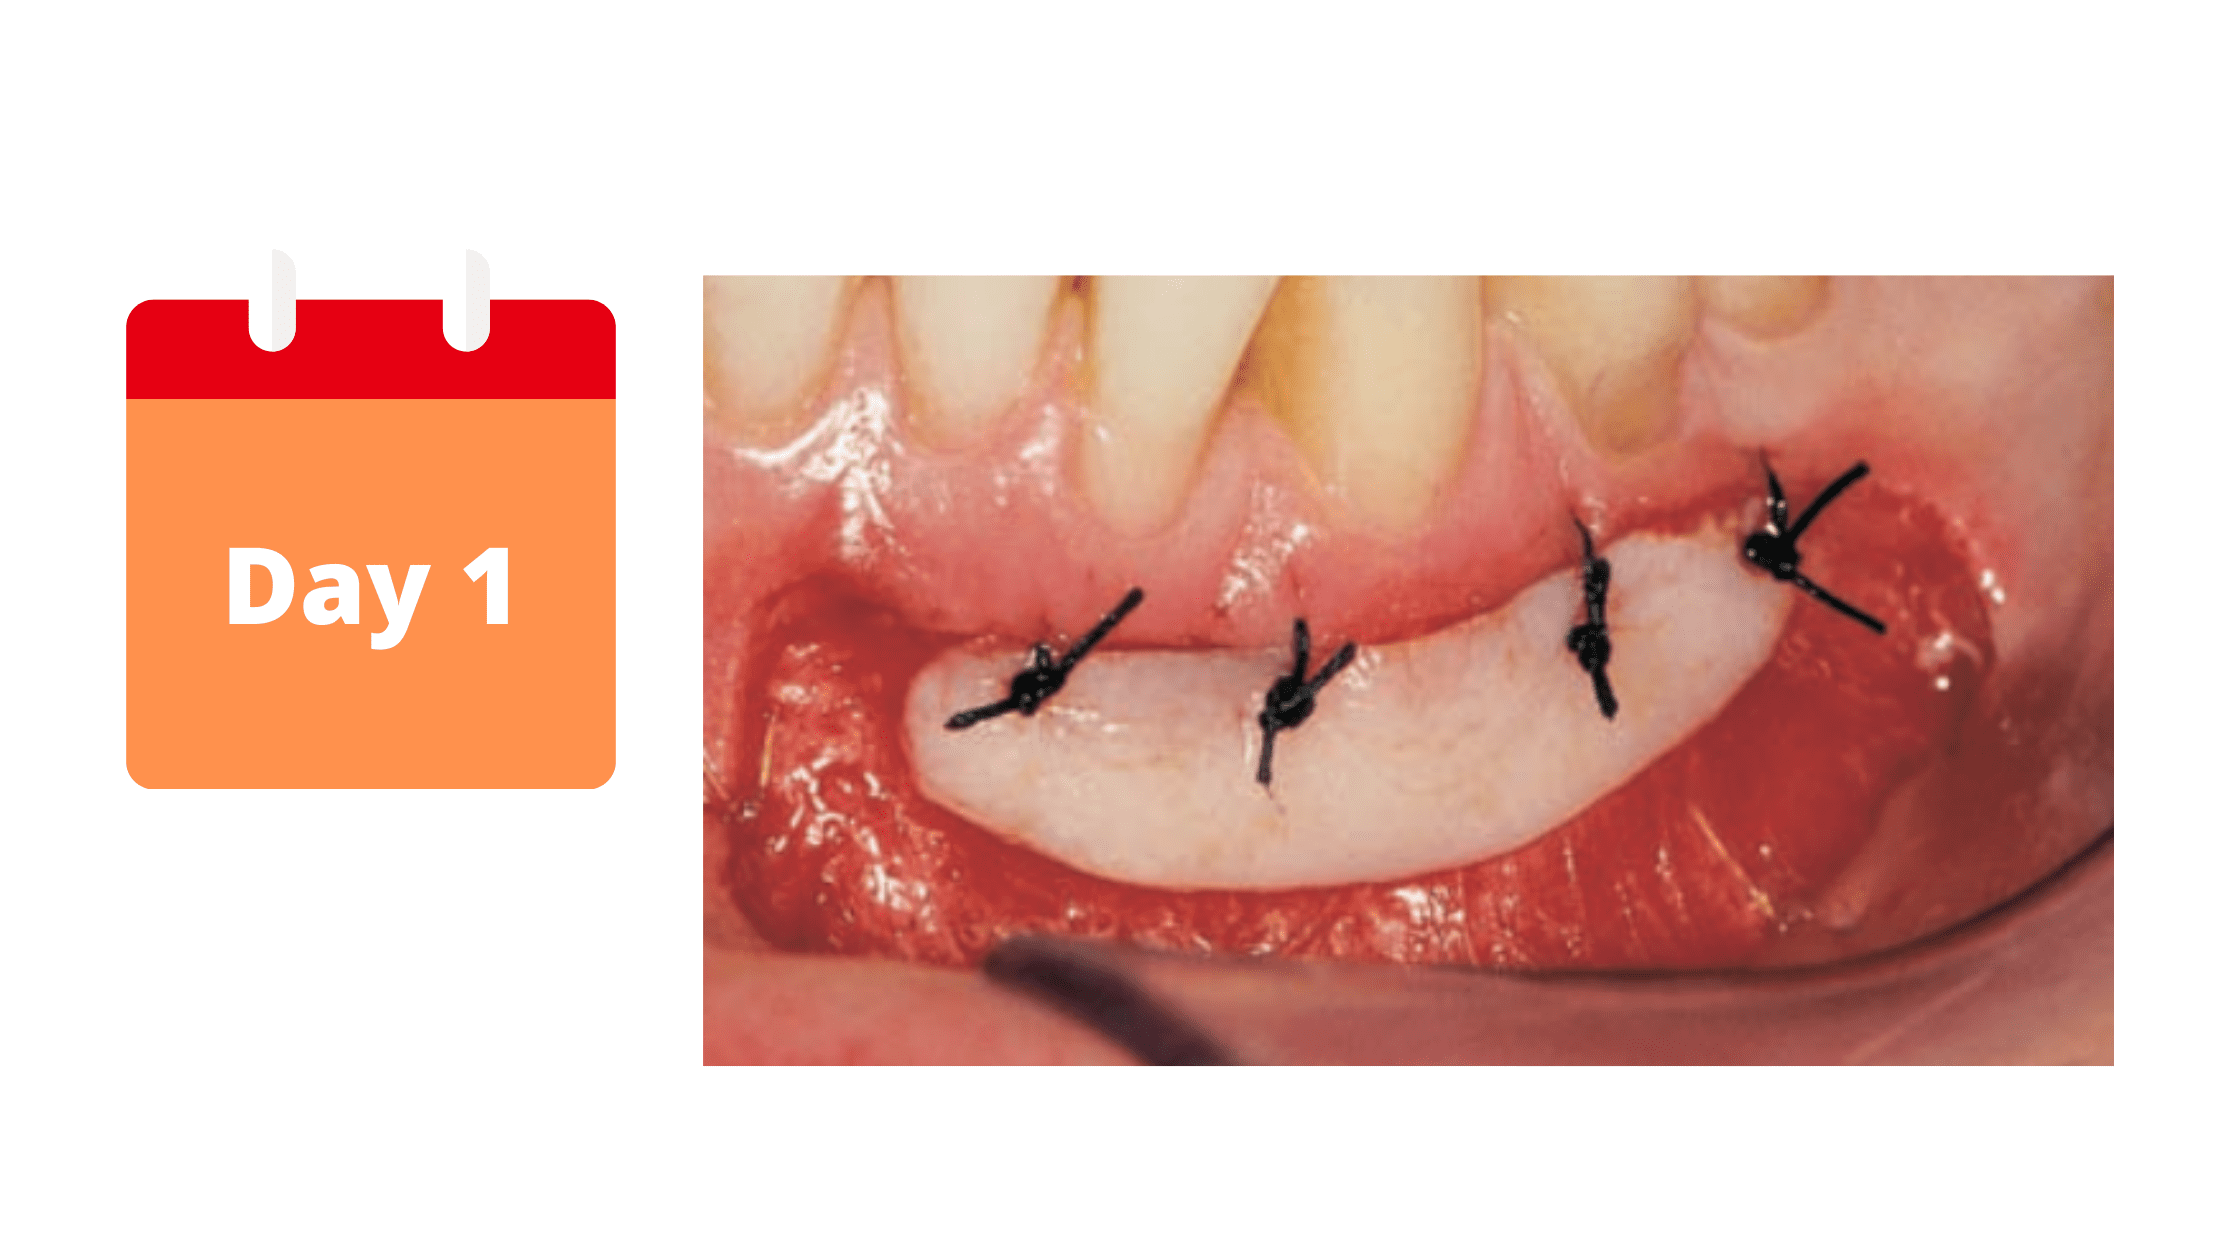
The first few days after a gum graft are the most important. The blood clot that forms around the graft immediately after the procedure is crucial for optimal healing.
It's a kind of blood mass that helps stabilize the graft, stop bleeding, and support cell migration into the surgical site. It’s also rich in growth factors that promote tissue regeneration.
That’s why you should not destabilize the blood clot or damage it, especially during the first 24 hours, by sucking, rinsing, spitting vigorously, or touching the graft with your tongue or fingers.
Inflammation is also expected, which peaks on the first day and gradually subsides by the third. You may notice signs like swelling, pain, and redness around the treated area.
What to do:
- Take the medication as prescribed by your dentist.
- Take a good rest.
- Follow a liquid diet.
- Be gentle with your mouth, especially around the surgical site.
- For the first 24 hours, apply ice to your cheeks near the surgical area, every hour for 10 minutes, then repeat.
- In case of bleeding, apply a cotton ball to the surgical site for 20 minutes with light pressure.
What not to do:
- Don't rinse your mouth or spit vigorously.
- Don't brush your teeth for the first 24 hours. You can use a cotton swab to clean your teeth, without touching the graft.
- Don't drink through a straw.
- Don't drink or eat hard, hot, or spicy foods.
- Don't smoke or do strenuous exercise.
2. Day 3: Granulation and New Blood Vessels
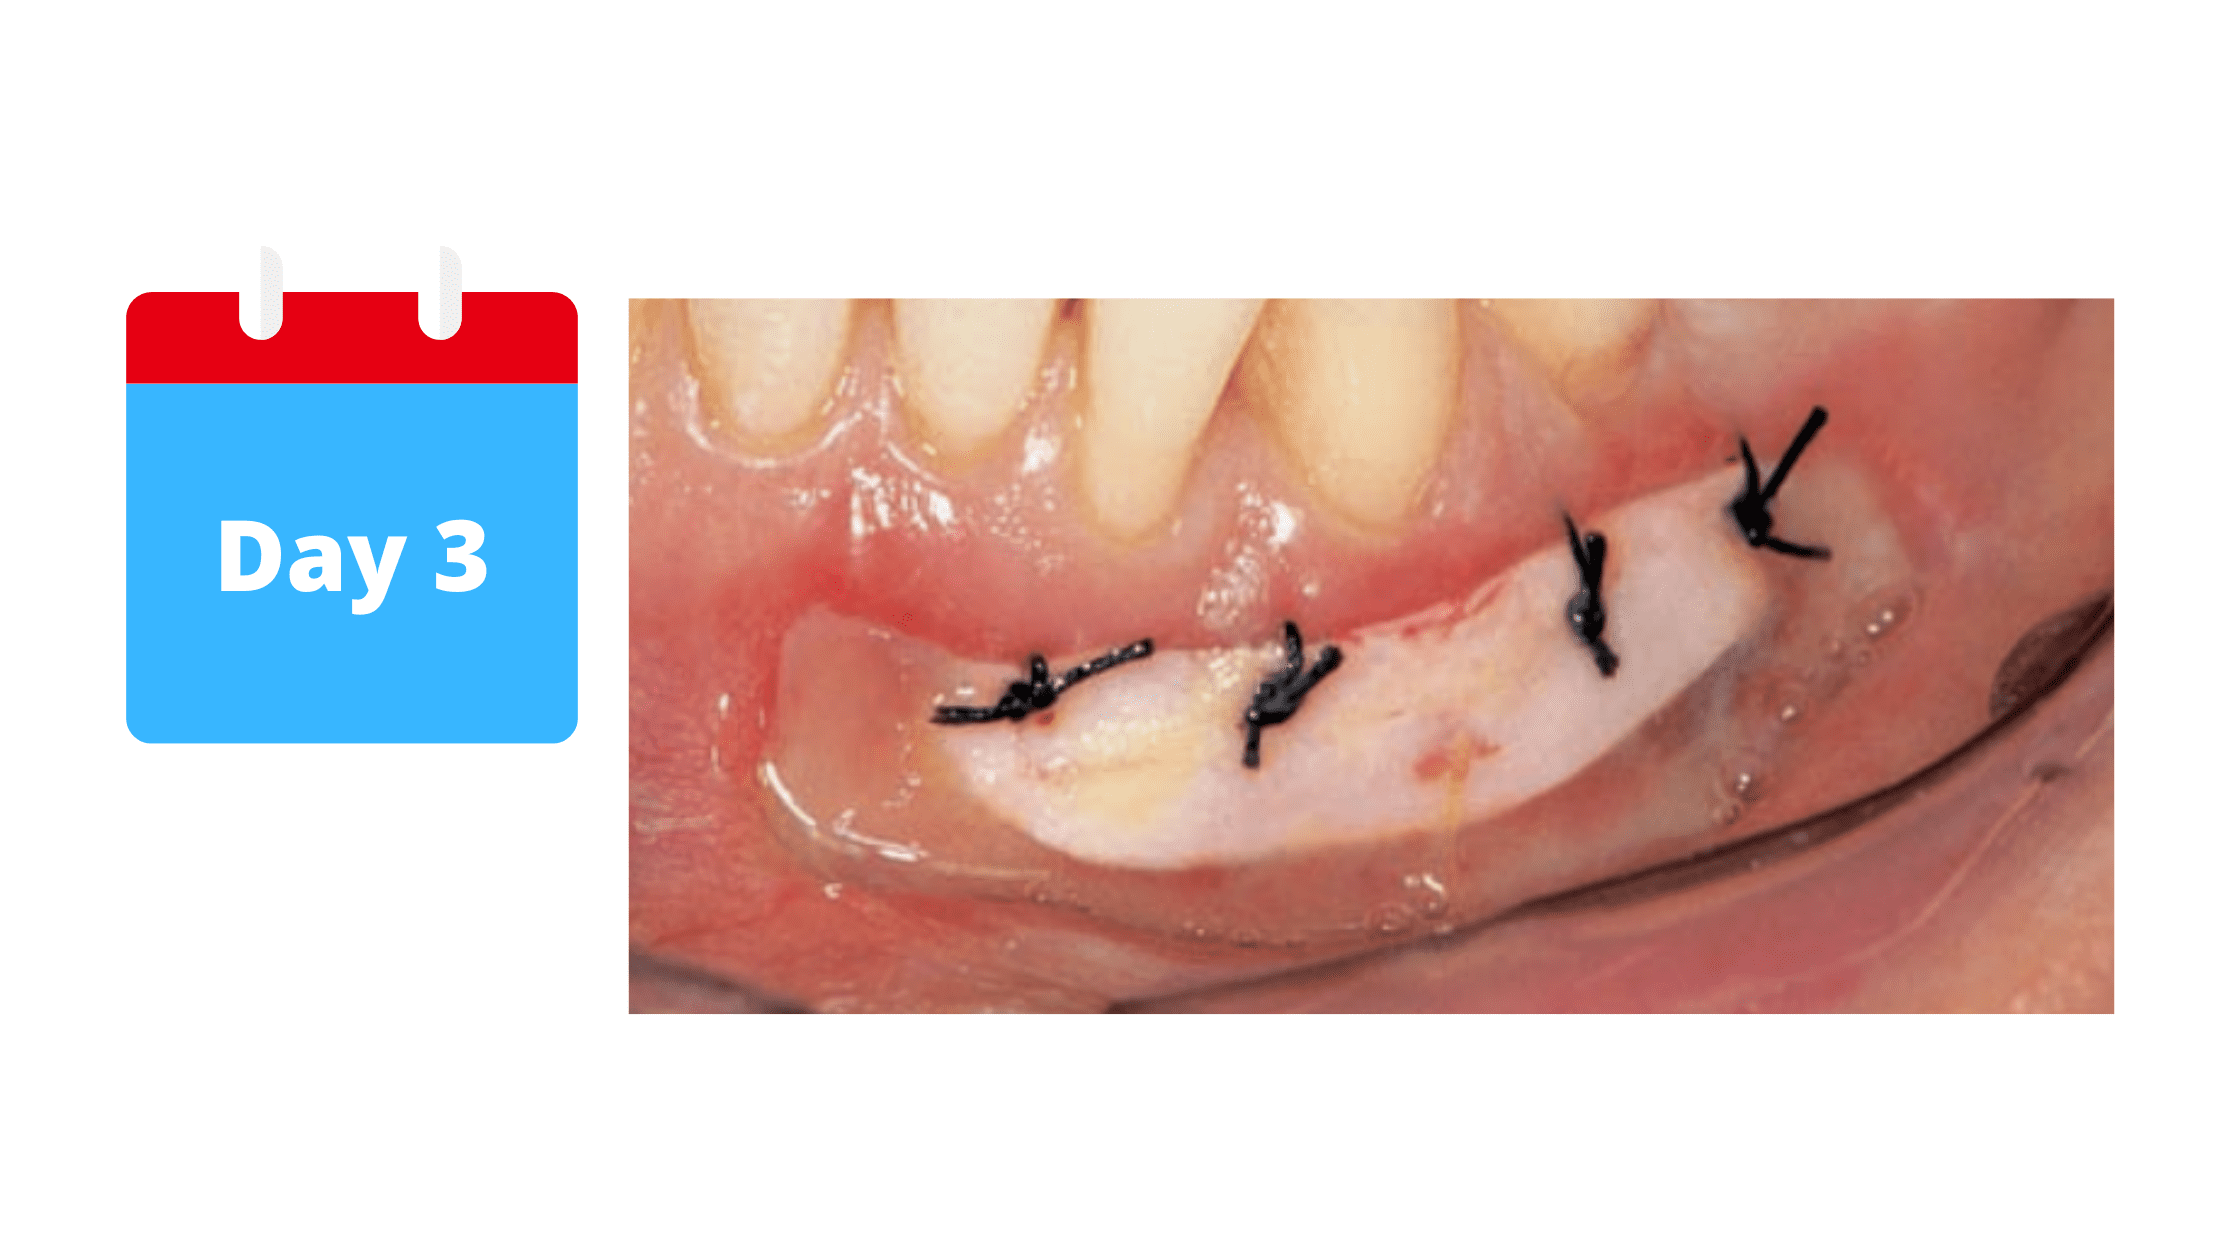
By this stage, cells have already started to multiply and migrate to the surgical site. At the same time, the blood clot gradually turns into granulation tissue, which is firmer and more stable.
This granulation tissue forms the foundation for new blood vessels, supplying the nutrients the graft needs to survive and integrate.
In the image above, the redness around the graft is a sign that new blood vessels are forming.
Don’t worry if the graft looks white or unpleasant at this stage. It's completely normal and expected, as your body must first remove the outer layer of the graft to form a new, well-fitting one. The appearance of the graft will gradually improve as it attaches to its recipient site.
What to do:
- Switch to warm compresses instead of cold ones.
- Use antiseptic mouthwash as prescribed by your dentist.
- Use saltwater rinses (1/2 teaspoon for 1 cup).
- You can brush your teeth gently with a soft toothbrush.
What not to do:
- Do not touch the graft with your toothbrush or tongue yet.
- Avoid hard and crunchy foods, and stick to a soft diet.
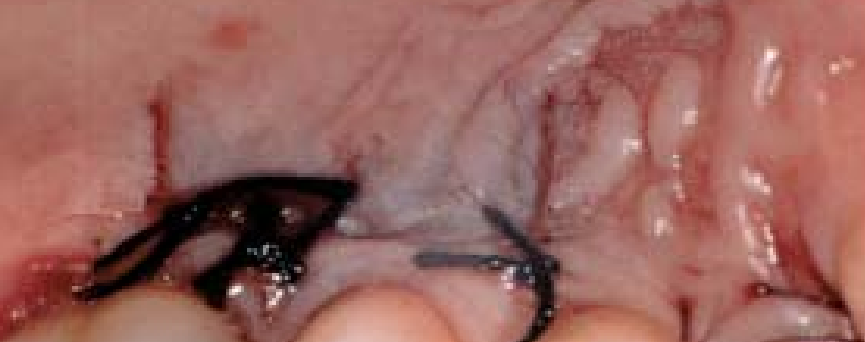
3. After one week: Graft Attachment
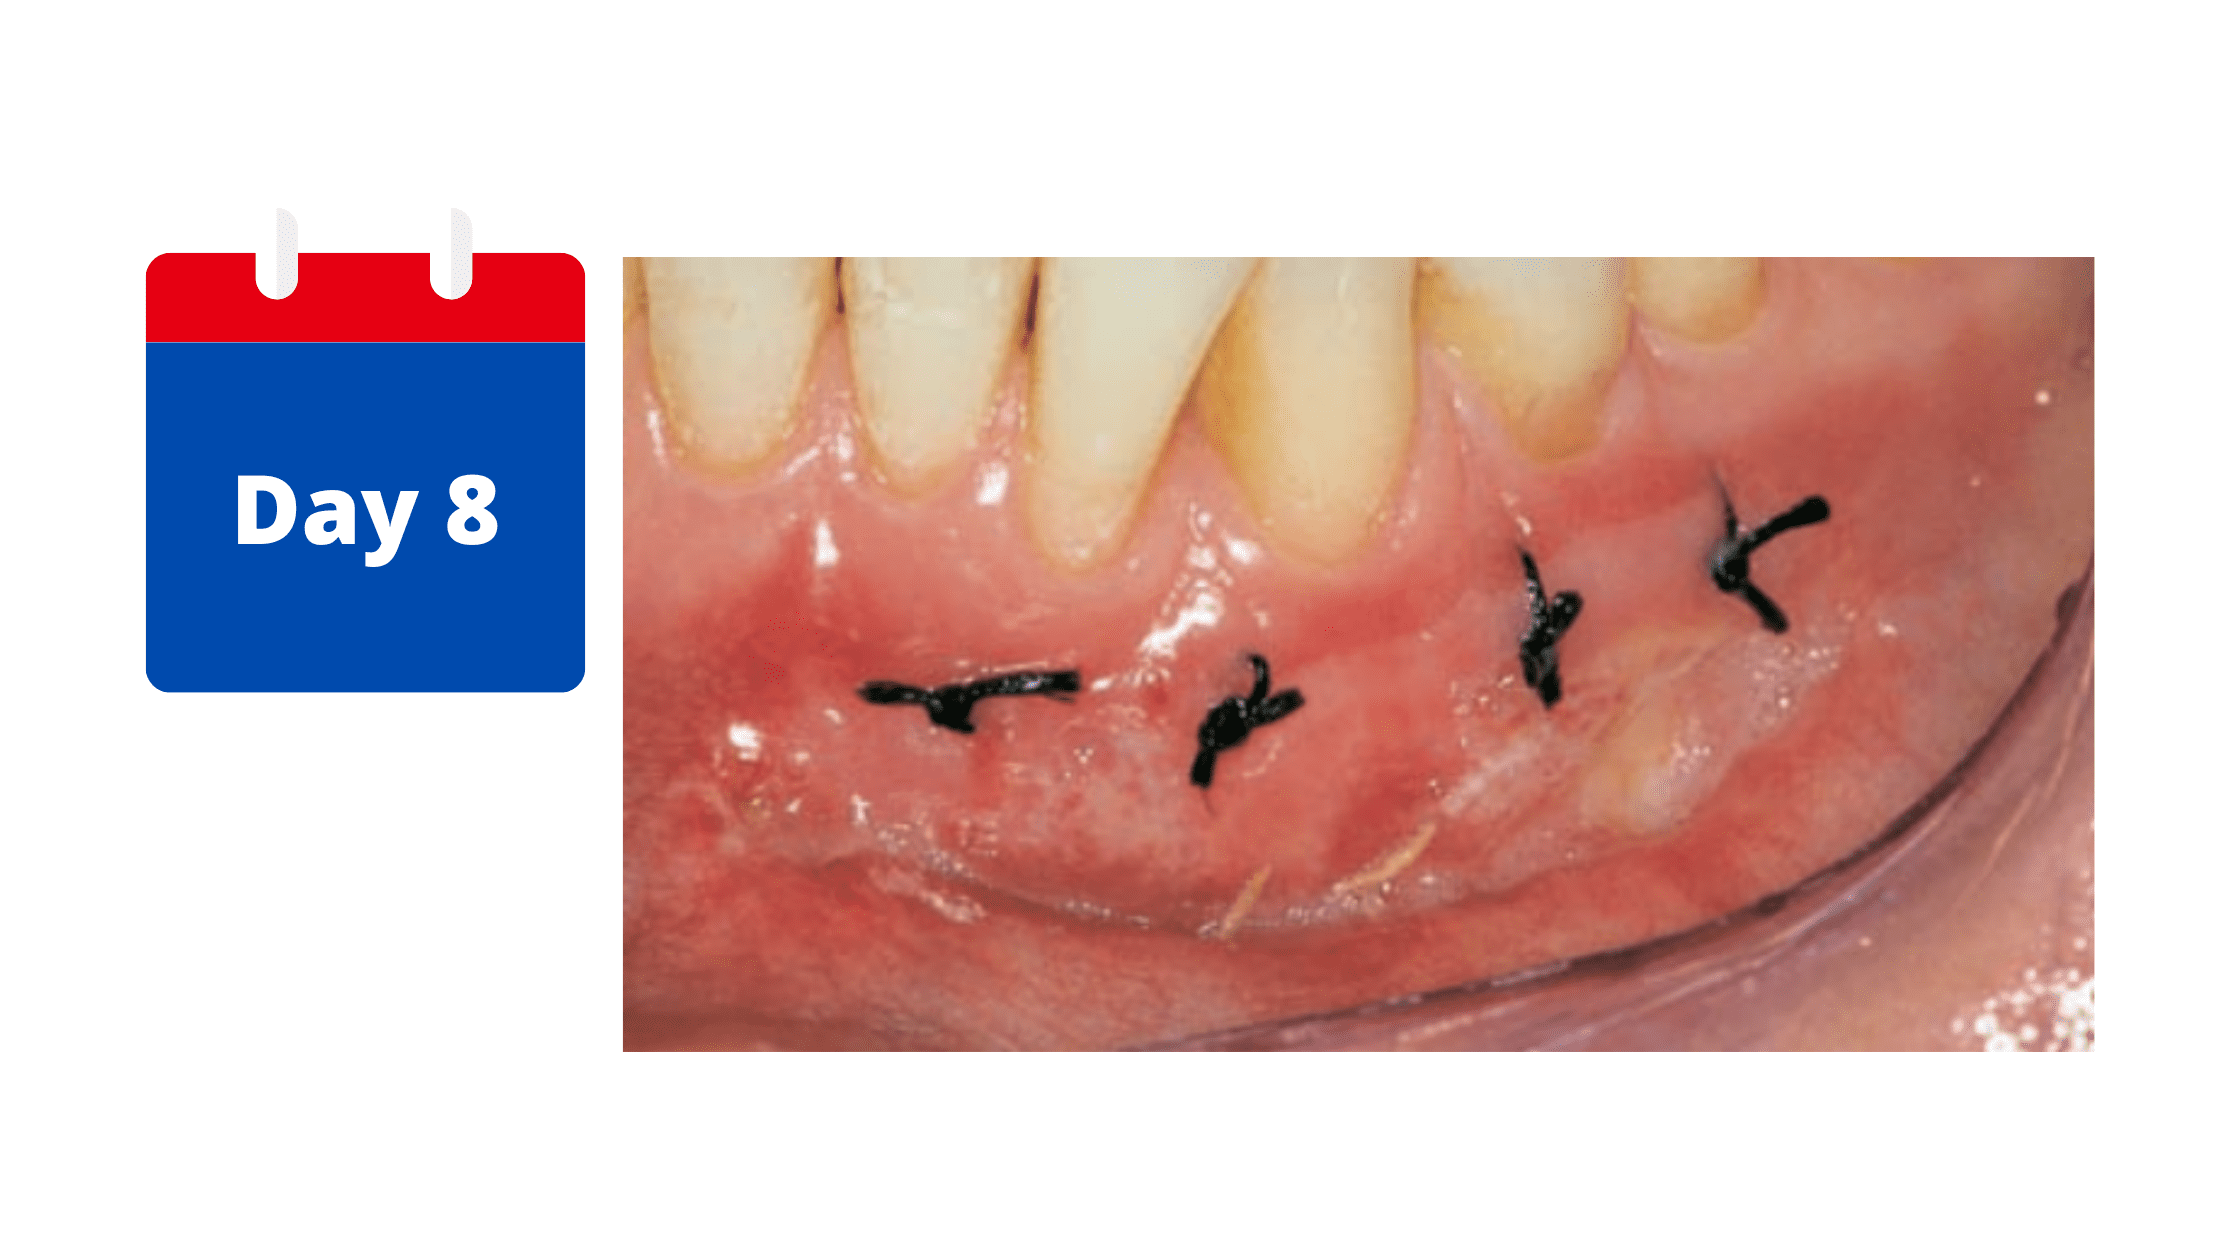
The old, dead outer skin of the graft is replaced by a new layer that is better attached and blends with the surrounding gum tissue. At this stage, the sutures can be safely removed.
Signs of inflammation—such as swelling, redness, and pain—should have decreased or disappeared.
You will also be allowed to gradually resume your oral hygiene routine at the surgical site, starting gently with a soft toothbrush.
If the graft looks normal from the outside after the first week, the maturation process will continue over the course of the first month.
What to do:
- Resume your normal oral hygiene routine, but be gentle at first.
- You can gradually introduce hot, solid foods.
What not to do:
- Do not apply too much tension on the graft. Maturation is still in progress.
4. After 4-6 weeks: Maturation
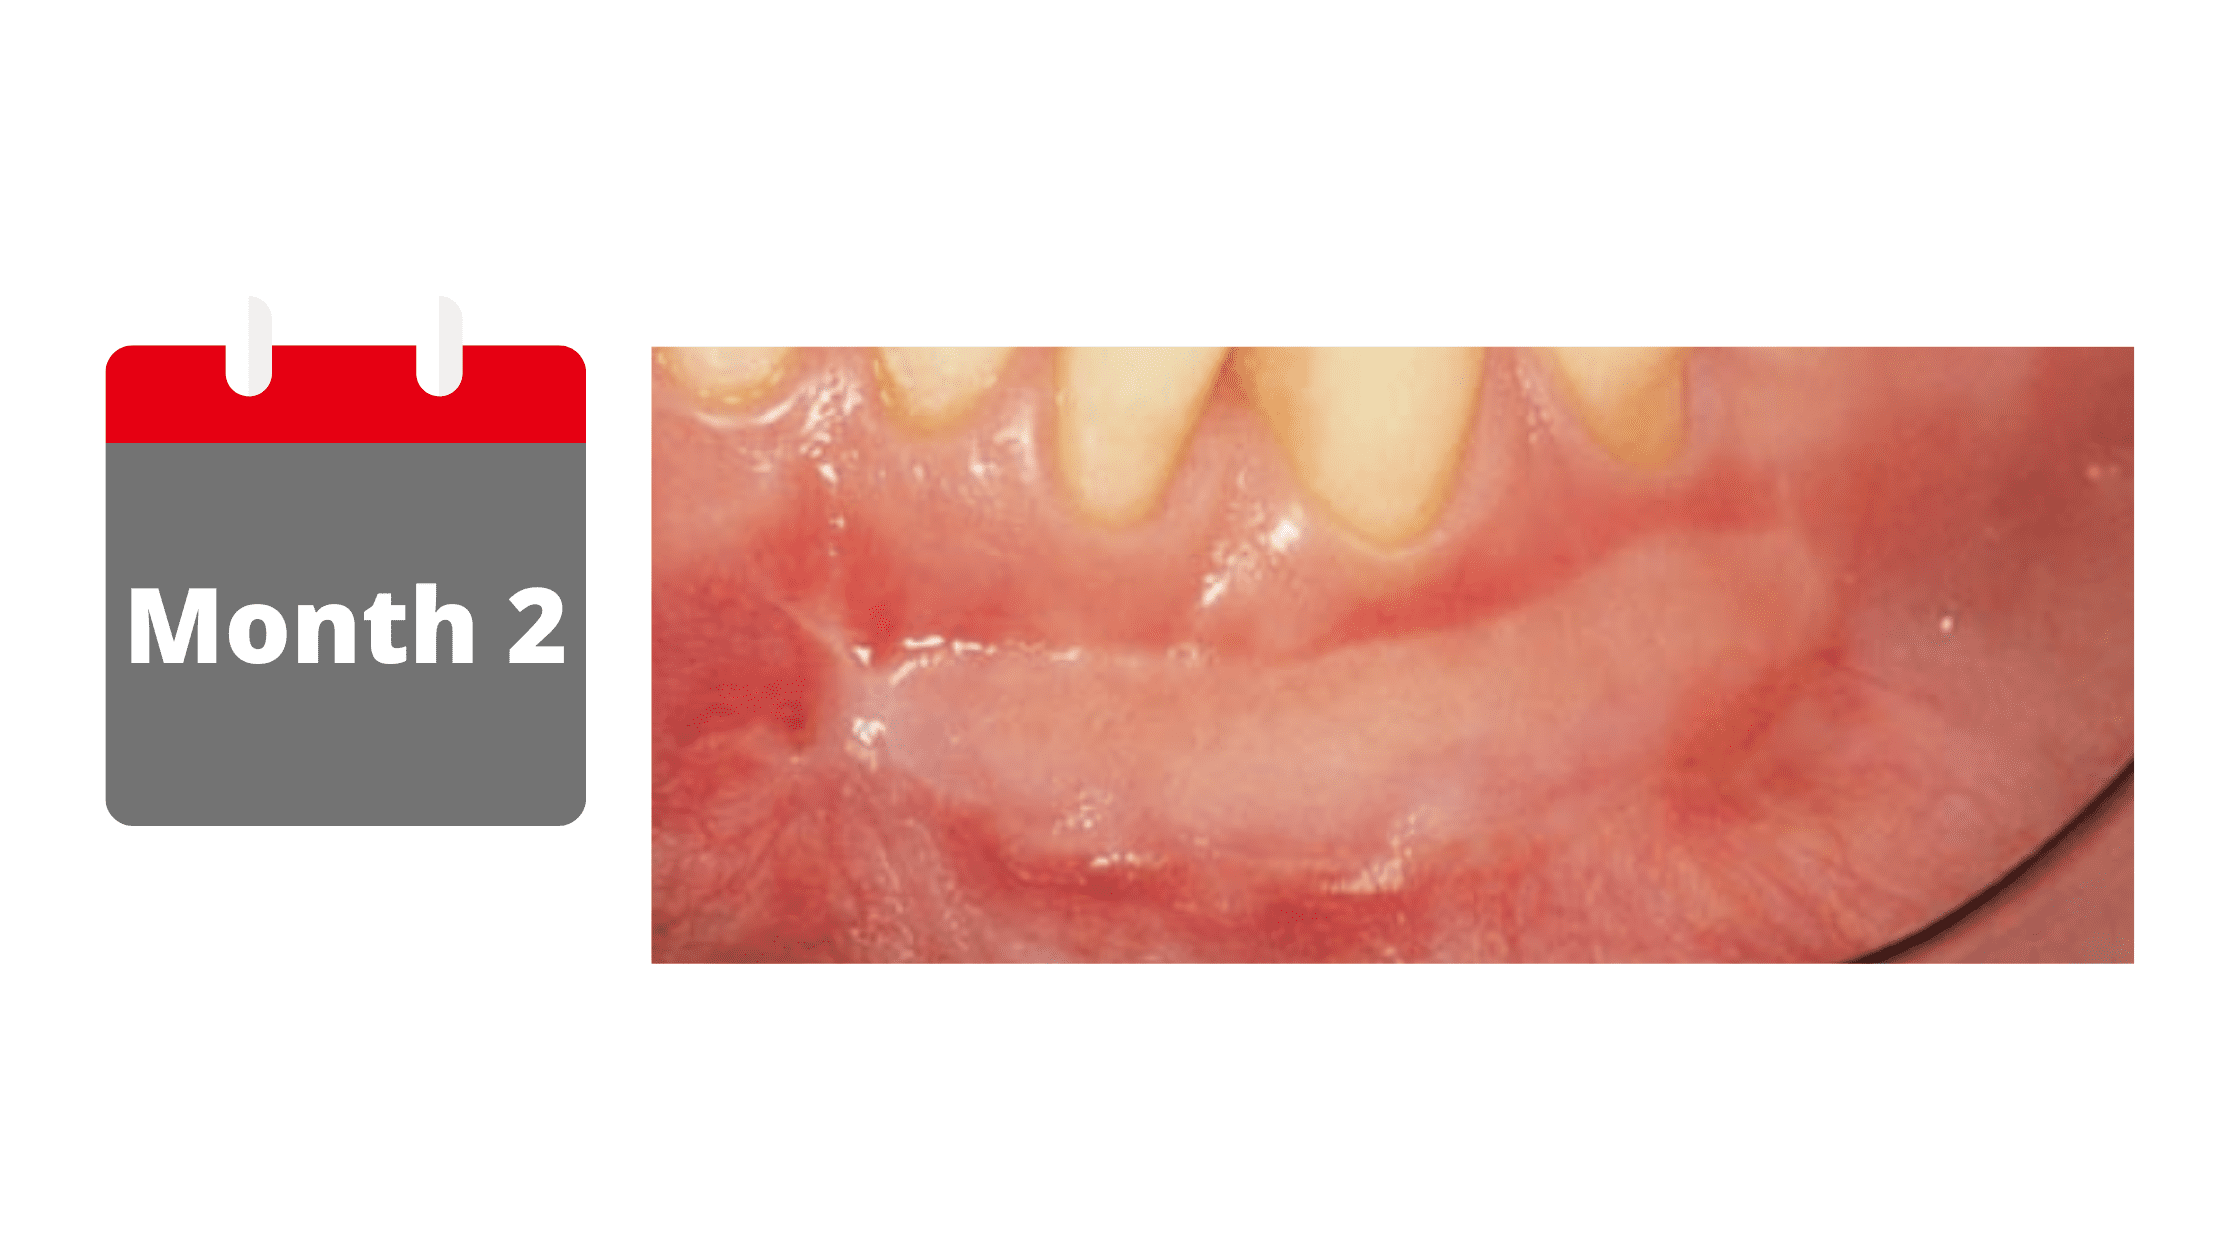
By the end of the first month, the gum graft nearly completes its maturation. It gradually takes on the texture and pale pink color of the roof of the mouth, where the graft was taken.
You can expect the gum graft to shrink up to 20% from its original size. After this initial change, the results should remain stable for years to come.
The different healing stages of the donor site (roof of the mouth):
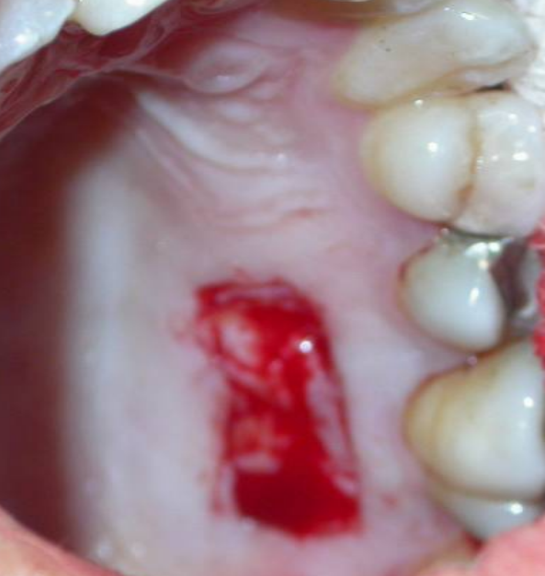
The donor site—usually the roof of your mouth (palate)—can feel sore and tender after surgery, and it often takes longer to heal. But, this mainly depends on the specific technique used.With connective tissue grafting, only the inner layer of tissue is taken from the palate, while the outer skin is left intact. This technique allows faster healing with less discomfort because the wound edges are stitched together, helping them to close smoothly. We call this healing by primary intention.
On the other hand, free gingival grafting involves removing the full thickness of tissue from the palate, not just the inner layer. Since the wound edges aren’t stitched together, it can be more painful and take longer to heal—sometimes several weeks.
Here's what to expect in the healing process of the roof of the mouth:
- The first week after the procedure will be the toughest. In the initial hours following the procedure, your palate may be sore, red, and swollen, and you may feel pain or a burning sensation as the numbing effect wears off.
- After that first week, most of the pain and swelling will start to go down. You might still feel some tenderness in the surgical site, but it won't be as intense as before.
- As you move into the second week, you'll begin to see a new outer skin forming. However, the complete healing process and maturation can take up to 4-6 weeks, depending on the size of the wound and how well your body heals.
How to ensure optimal and smooth recovery of the roof of the mouth?
After the procedure, your dentist or periodontist will stitch the palate wound or cover it with a dressing to protect it and stop bleeding.You may also receive a mouth appliance or plastic mouthguard. Be sure to wear it during the first week, removing it only when brushing or rinsing your mouth.
Here are some tips to ensure a smooth and optimal recovery:
First 1-2 days:
- Take the pain medications as prescribed by your dentist
- Apply cold compresses for the first 24 hours to reduce swelling in the following days
- Take a good rest and avoid strenuous exercises
- Do not rinse your mouth or drink through a straw for the first 24 hours
- Stick to a soft diet and avoid solid, hot, or spicy foods
- Do not smoke, especially during the first week
- Do not touch the wound with your tongue or fingers
After 2 days:
- Rinse your mouth with salt water (½ teaspoon of salt in a cup of warm water). Do this after meals and after removing your appliance.
- Avoid mouthwashes that contain alcohol
- Continue to take your pain medication as directed
The following days until recovery:
- Healing will gradually improve. After the second week, the discomfort will subside, and you can resume your oral hygiene and eating habits. However, call your dentist if you notice the following signs:
- Increasing pain that gets worse and worse
- Persistent swelling
- Bleeding is excessive and uncontrollable.
- Pus leaking from the wound
What to expect after the healing phase?
Gum grafting is one of the most effective treatments for receding gums, with consistently high success rates.One of the main reasons for this procedure is to cover areas where the gums have pulled away, which is often a cosmetic concern—especially for the front teeth.
How well the graft covers exposed roots largely depends on the severity of the recession: the wider and deeper it is, the more challenging it becomes to achieve full root coverage.
You can generally expect full root coverage when the recession is small, narrow, and shallow (between 1 and 3 mm). If only one tooth is affected, successful results are almost guaranteed.
If the recession is mild to moderate (3.5 to 5 mm) and does not involve the gum between teeth, the chances of healing and success remain high.
However, when the recession is severe, extends to the gum between teeth, and affects multiple teeth, root coverage after surgery may only be partial, and the likelihood of long-term stable results decreases.
Possible complications of a gingival graft:
Although complications after a gingival graft are rare, it is important to follow the postoperative advice of your dentist to avoid them and reduce postoperative discomfort.If you experience any of these complications, talk to your dentist to address them quickly. These include:
- Excessive bleeding: This can occur at either the donor or recipient site and may require additional intervention to control.
- Graft failure: The graft may not successfully integrate with the surrounding tissue, which may require additional procedures. The most common cause is a lack of blood supply. Signs that the graft has not survived are a white or gray discoloration and a tendency for the graft to come out of the recipient site.
- Infection: This can also occur at the donor or recipient site and can be serious if not treated. Symptoms include severe pain, pus leakage, bad breath, and persistent swelling and redness.
- Persistent pain: Some discomfort and pain are expected during the healing process. But long-lasting or intense pain may indicate an issue such as infection or graft failure.
- Poor aesthetics: If the gum appearance does not meet your expectations, you may need additional procedures to achieve the desired result.
Patients with certain medical conditions like diabetes, blood disorders, or who smoke run a higher risk of graft failure.
But remember that the above complications are different from the normal postoperative effects. The latter are mild and temporary and are part of the healing process. They gradually decrease within the first week after the procedure.
- Color Atlas of Dental Medicine: Periodontology - Book by Edith Rateitschak-Pluss and Herbert F. Wolf
- The connective tissue graft: a comparative clinical evaluation of wound healing at the palatal donor site. A preliminary study https://pubmed.ncbi.nlm.nih.gov/12423299/
- Complications of free grafts of masticatory mucosa https://pubmed.ncbi.nlm.nih.gov/1079047/
- Postoperative complications following gingival augmentation procedures https://pubmed.ncbi.nlm.nih.gov/17209793/
- Miller, P.D., Jr. (1987), Root Coverage with the Free Gingival Graft. Journal of Periodontology, 58: 674-681.
- Silva, C.O., Ribeiro, É.D.P., Sallum, A.W. and Tatakis, D.N. (2010), Free Gingival Grafts: Graft Shrinkage and Donor-Site Healing in Smokers and Non-Smokers. Journal of Periodontology, 81: 692-701.
- Oliver, R.C., Löe, H. and Karring, T. (1968), Microscopic evaluation of the healing and revascularization of free gingival grafts. Journal of Periodontal Research, 3: 84-95.
- Griffin TJ, Cheung WS, Zavras AI, Damoulis PD. Postoperative complications following gingival augmentation procedures. J Periodontol. 2006 Dec;77(12):2070-9. doi: 10.1902/jop.2006.050296. PMID: 17209793.